Panorama: Understanding the How_to's
 There is something about the panorama that makes it a different experience compared to a more typical aspect ratio photo (8x10, 5x7, 4x6, etc). Maybe it is because there seems to be much more to see. In this discussion, we will look at the panorama that is made up of multiple images and "stitched" together in a photo editing program, like Photoshop CS3 or Photoshop CS4. Okay, let's look at the the elements to consider when taking a multi image panorama.
It goes without saying that subject matter is an extremely important component, but once the subject is selected, the technical considerations come to the forefront. In making a panorama image, multiple images must overlap and have the same depth of field, the same focus, the same shutter speed, and the same ISO. We are not going to use any of the camera's automatic settings like Program, Aperture Priority, or Shutter Priority. You may be saying to yourself, this is too complicated. It is not as difficult as you think.
Keep the aperture (f-stop) constant: The depth of field, partly controlled by the aperture setting, is important in that aperture is a controlling element in maintaining the depth of field information. Having the same depth of field in each image will allow a more seamless joining of the images.
Keep the shutter speed constant: Since, we have a constant aperture, it is important that the shutter speed is constant. If not, the tones/colors in the image will change. More time will make the image brighter; less time will make it darker. This will not make for good blending of multiple photos into one final image.
Keep the focus point and lens the same: Keeping the same focal length lens is also critical in keeping the same depth of field. Aperture, lens focal length, and focus point all affect depth of field. Keeping the same depth of field and the same focus is essential to creating a good panorama. Remember, NO auto focus!
Overlap each photo by 30% to 50%: The software used to assemble the panorama must have reference points to assist in aligning the individual photos. This works best if the number of reference points are sufficient to identify overlapping areas. An overlap of 30% to 50% normally will satisfy this need.
These are the basic settings. The settings are easily accomplished with a digital SLR, but it can be done with a point and shoot if the settings can be made if the camera has a manual mode.
Tomorrow, we'll investigate camera orientation, using tripods, selecting a reference point/line, and capture sequence.
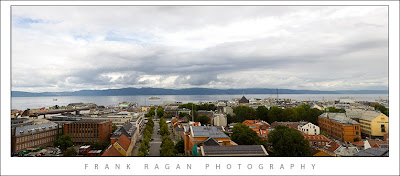
By the way, the image at the top of this post is made up of 6 photos taken from the top of a church in Trondheim, Norway.


Beautiful pano, Frank. I didn't realize creation of panso required this much overlap.
ReplyDeleteHi Jade Lady,
ReplyDeleteThanks for the comments. I hope you find value or amusement in the blog. Say hey to David.