Gradient on a Levels Mask
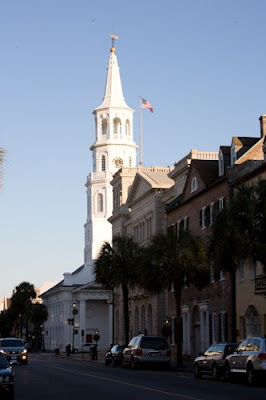
Sometimes you look at one of your photos and think that the shadow areas are just a bit too dark; maybe you would like to see more detail. Or, you might say, I wish that some areas were a bit darker. The photo above might be improved if the street and buildings in the lower portion of the image were a little brighter, and the sky might be a little more dramatic if it was a little darker. There are lots of dodge (lighten) and burn (darken) techniques, but in the image above might be improved by using Levels and a gradient on a layer mask because of the almost straight lines separating the sky from the rooftops.
Both Photoshop and Photoshop Elements utilize the power of Adjustment Layers. Using Adjustment Layers allows for adjustments to be put in place without damaging the original photo information until those adjustments meet your requirements.
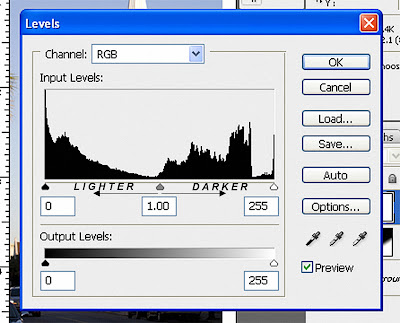
If you open a Levels Adjustment Layer, you will encounter a dialog box similar to the one displayed above. Each version of Photoshop might display a slightly different dialog box, but the basics are the same. The center (or midpoint) slider just below the histogram can be moved to the right to darken the tones in the image, or to the left to lighten the tones in the image.

In the image at the top of the post (a street in Charleston, SC), I moved the center slider to the left to lighten the tones in the image. But I didn't want the sky to become lighter.
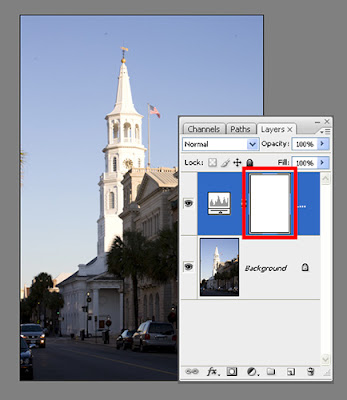
Once I clocked OK in the dialog box, the Layers Pallet displays an Adjustment Layer with a mask (outlined above in red). The White color of the mask indicates that all of the adjustment is applied to the entire layer. Black will completely block the adjustment form the layer and gray will partially block the adjustment. I would like to block the adjustment in the area of the photo that is sky.
If I select the Gradient tool and make sure that it is drawing a gradient from white to black (exposing to hiding the adjustment), and I have the mask active (it is outlined in a black frame - see the red highlighted layer mask above), I can draw with the gradient tool directly on the image (as indicated above).
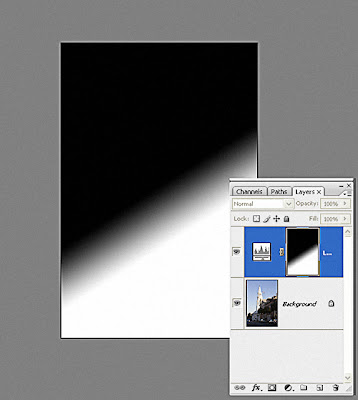
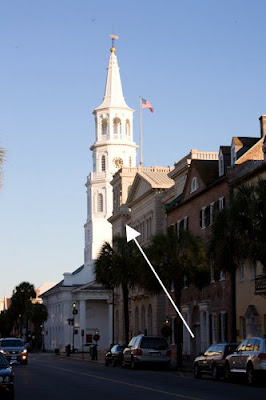
The mask will go from white (exposing or revealing the adjustment) to black (hiding the adjustment) in a smooth transition. This type of transition works well when there are generally straight lines where the transition occurs, as in the roof tops of the buildings.
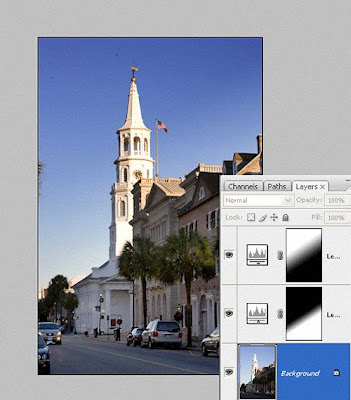
I applied a second Levels adjustment to darken the sky (moving the center slider to the right). I added another gradient to the mask in the opposite direction which applied the adjustment to the sky and not the buildings.
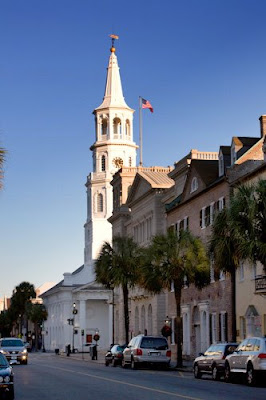
I think the final result is an improvement. What do you think?


Comments
Post a Comment